How to set up Automatic Replies (Vacation Notice) in Microsoft 365?
You can set up Automatic Replies (Vacation Notice) in your Microsoft 365 (M365) account using either MS Outlook or the Microsoft 365 Outlook Web App (OWA).For instructions on MS Outlook 2019, please refer here.
To set up Automatic Replies in your M365 account with Outlook Web App (OWA):
- Log in to your M365 account via Microsoft 365 Outlook Web App (OWA).
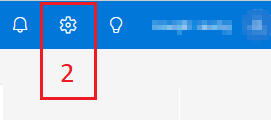
- Click the gear icon
 at the top-right corner.

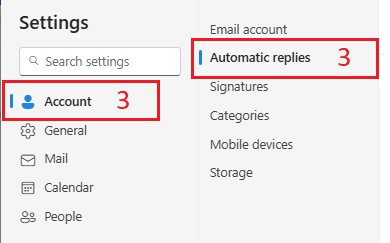
- In the left pane, select "Automatic replies" under "Account".
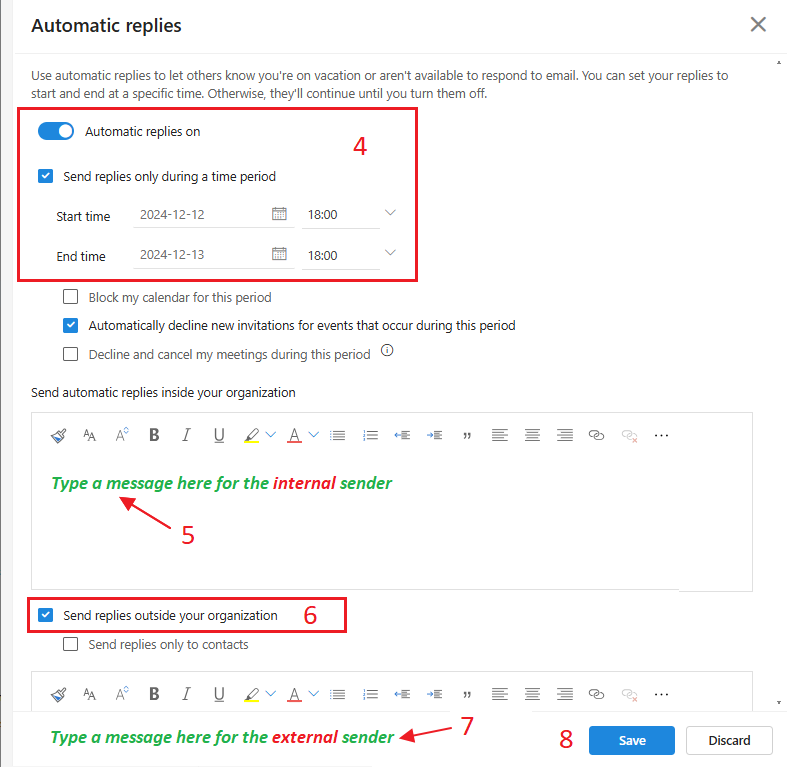
- Turn on "Automatic replies on". To schedule them, check "Send replies only during a time period" and set the "Start time" and "End time".
- Enter your response for internal senders (Note: staff and students/alumni are considered external to each other).
- To reply to external senders, check "Send replies outside your organization".
- Enter your response for external sender.
- Click "Save" to finish.


- An "Internal Sender" is a CityUHK M365 user whose Email Address ends with "@cityu.edu.hk".
- If you leave the text fields empty while Automatic Replies are enabled, senders will not receive the reply.
To turn off (disable) Automatic Replies
Turn off "Automatic replies on" to disable them. By default, Automatic Replies are turned off.
Return to FAQs on CityUHK Microsoft 365
IT.ServiceDesk@cityu.edu.hk


